DIY: 5 Homemade Christmas Gifts to Spread Holiday Cheer!
Christmas is a time for giving and spreading joy, and what better way to do so than by creating homemade gifts? DIY Christmas gifts show the recipient that you care and provide an opportunity to unleash your creativity and make something truly unique. With the holiday season fast approaching, it’s time to consider what gifts you’ll be giving this year. From hand-stamped jewelry to homemade body scrubs, we’ve compiled a list of 5 DIY Christmas gifts that will spread holiday cheer. So, get your crafting supplies ready and let’s dive into some fun and festive DIY projects!
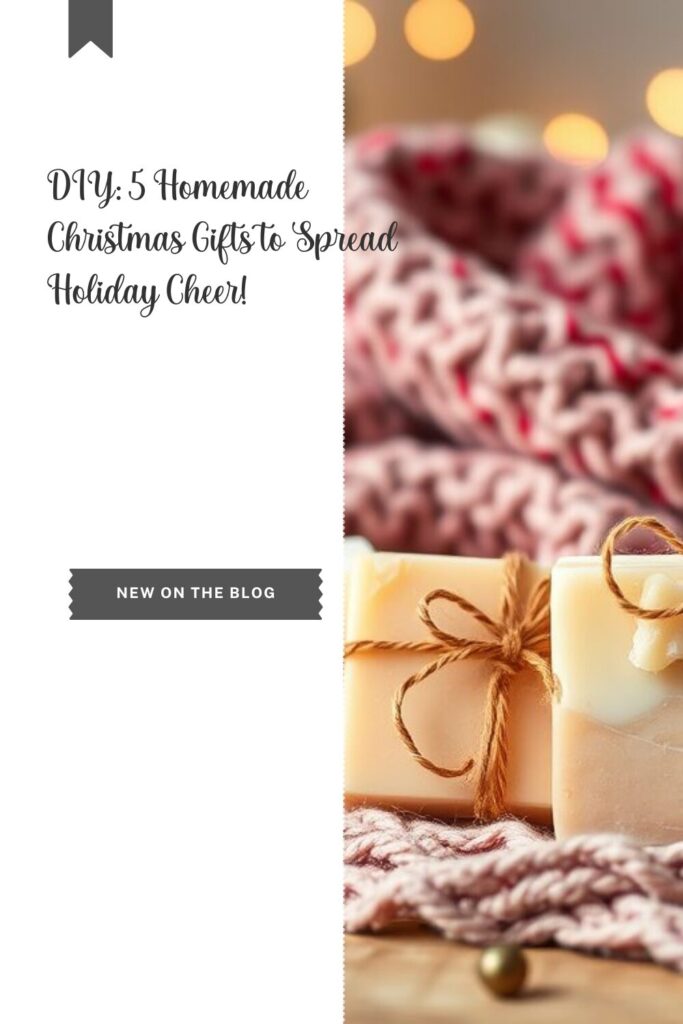
Handmade Soaps:
Making soap can be a fun and creative way to create a personalized gift. You can find soap-making kits online or at craft stores and choose your scents and additives.
Instructions:
- Gather your supplies:
You will need a soap base, fragrance or essential oil, soap mold, and additional ingredients such as dried flowers or herbs.
- Melt the soap base:
Cut the soap base into small chunks and melt it in a double boiler or microwave. Stir the soap base occasionally until it is completely melted.
- Add fragrance and additional ingredients:
Once the soap base is melted, add a few drops of fragrance or essential oil and additional ingredients such as dried flowers or herbs.
- Pour the soap into the mold:
Pour the melted soap mixture into the mold, filling it to the top.
- Let the soap cool:
Allow the soap to cool and harden for several hours or overnight.
- Remove the soap from the mold:
Once the soap is completely hardened, gently remove it from the mold.
- Wrap the soap:
Wrap the soap in a decorative paper or fabric, and add a tag or label with the scent and any additional information.
Knitted Scarf:
A knitted scarf can be a cozy and heartfelt Christmas gift for a loved one. If you know how to knit, a cozy scarf is a great gift that can be customized with the recipient’s favorite colors. Here are the steps to making a knitted scarf:
Instructions:
- Choose your yarn:
Choose a soft, warm yarn in your loved one’s favorite color.
- Choose your knitting needles:
Choose knitting needles that match the weight of your yarn.
- Cast on stitches:
Cast on a multiple of 2 stitches, depending on how wide you want your scarf to be.
- Knit in stockinette stitch:
Knit every row in stockinette stitch until your scarf is the desired length.
- Bind off stitches:
Bind off all stitches and weave in the ends.
- Block the scarf:
Wet the scarf and lay it flat to dry, shaping it into the desired size and shape.
- Add finishing touches:
You can add tassels or fringe to the ends of the scarf for a decorative touch.
Personalized Ornaments:
Create your ornaments by using clear glass balls and filling them with glitter, small trinkets, or photos. Making personalized ornaments can be a fun and thoughtful Christmas gift for your loved one. Here’s how to make customized ornaments:
Instructions:
- Gather your supplies:
You will need clear glass or plastic ornaments, paint or markers, and additional decorations such as glitter, stickers, or ribbons.
- Choose a design:
Decide on a design for your ornament. You can paint or draw a design on the outside of the ornament or fill it with decorations.
- Paint or draw the design:
Paint or draw a design using acrylic paint or permanent markers. Let the ornament dry completely before adding any additional decorations.
- Fill the ornament:
If you’re filling the ornament, remove the top and fill it with decorations such as glitter, confetti, or small objects.
- Add finishing touches:
Add any additional decorations, such as stickers or ribbons, to the outside of the ornament.
- Personalize the ornament:
You can add a name or date to the ornament using a paint pen or permanent marker.
- Replace the top:
Once you’ve finished decorating the ornament, replace the top and add a string or ribbon for hanging.
Homemade Candles:
Homemade candles can be a thoughtful and personalized Christmas gift for your loved ones. Candles are a popular gift item, and can be made with natural beeswax, soy wax, or paraffin wax. You can add scents and colors to create a unique and personal gift. Here’s how to make homemade candles:
Instructions:
- Gather your supplies:
You will need wax (such as soy wax or beeswax), candle wicks, fragrance or essential oil, a double boiler, a thermometer, and candle containers.
- Melt the wax:
Melt the wax in a double boiler until it reaches the recommended temperature on the wax package.
- Add fragrance oil:
Once the wax has melted, remove it from the heat and add a few drops of fragrance or essential oil. Stir the mixture until it is well combined.
- Prepare the candle container:
Place a candle wick in the center of your chosen candle container.
- Pour the wax:
Slowly pour the wax into the candle container, filling it to the desired level.
- Let the candle cool:
Let the candle cool and harden for several hours or overnight.
- Trim the wick:
Once the candle has cooled, trim the wick to about ¼ inch.
- Add finishing touches:
Add a label or decorate the candle container for a personalized touch.
Personalized hand-stamped jewelry:
Hand-stamped jewelry can be a unique and personalized Christmas gift for your loved one. Here’s how to make hand-stamped jewelry:
Instructions:
- Gather your supplies:
You will need metal blanks (such as aluminum, brass, or copper), jewelry stamps, a hammer, a bench block, pliers, jump rings, and a chain.
- Choose your design:
Decide on a design for your jewelry. To spell out a name or message, you can use a single letter or multiple letters.
- Stamp the metal blanks:
Place the metal blank on the bench block and use the stamp to make an impression on it. Use the hammer to gently tap the stamp onto the metal, being careful not to move the stamp.
- Add finishing touches:
Using a metal file or sandpaper, you can add designs or embellishments to the metal blank.
- Attach the jump rings:
Use pliers to attach jump rings to the metal blanks. This will allow you to attach the metal blanks to the chain.
- Attach the chain:
Attach the metal blanks to the chain using the jump rings.
- Add a personalized message:
Metal stamps can add a customized message or name to the jewelry.